

While not the most entrancing feature in our bathrooms and kitchens, caulk plays a pivotal role in sealing surfaces, waterproofing and creating a neat, seamless aesthetic. In order to fulfil these essential backstage duties, the material needs to dry out properly, which means for the manufacturer-approved duration and allowing to allow for complete curing. But how long does caulk sealant take to dry out?
That’s exactly what this guide is here to answer. So, before you hop into your newly sealed bathtub or make a start on a spot of DIY painting, it’s important you understand how long you’ll need to wait before using the touched-up area. *Spoilers* it’s probably going to be a few hours before it’s touch-dry and more like 24 to be fully cured.
Nonetheless, this guide will take you through the entire drying process so you’ll know what to expect, how to ensure a spotless job and the best sealants to use for your bathroom or indeed anywhere in your home. We’ll also be keeping it short and sweet, so it feels less like watching paint (well, caulk) dry…
- The Answers at a Glance
- What is Caulk & How Does it Work?
- How Long Does Caulk Take to Dry On Average?
- Factors Affecting Drying Time
- Quickfire Caulk Dos & Don’ts
The Answers at a Glance
We get it, you DIYers are busy people. To help you spend more time caulking and less time reading, here’s the TL;DR.
- How long does caulk take to become touch-dry? – Caulk generally takes between 30 minutes and 2 hours to be touch-dry. Leading brands might even be closer to the 15-minute mark.
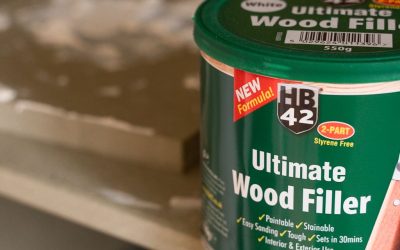
- How long does caulk take to dry before it’s ready for painting? – It depends on the product, but it can be as little as 1 hour or as long as 24. The latter is generally recommended for the best results, but with premium products like HB42 Ultimate Decorators Caulk, you’re good to go in 60 minutes.
- How long does the curing process take? – Usually, 24-48 hours, subject to the product specs.
- Can you make caulk dry faster? – To aid the process, ensure effective ventilation (e.g., open windows and dehumidifiers), maintain a temperature above 5°C and avoid unnecessary exposure to moisture.
What is Caulk & How Does it Work?
Whether you’re replacing old caulking to help prevent future mould and mildew, or you’re doing the finishing touches on a brand new kitchen installation, having a good grasp on how your materials work is a great motivator for a careful application and a professional-level finish.
A Caulk Deep-Dive
With an entry into the English language and its earliest usage dating back to ship-building in the 19th century, decorator’s caulk has a long and interesting story. It’s a type of flexible filler or sealant designed to fill cavities along with cracks and gaps around different interior surfaces, from brickwork and skirting boards to walls and window casements. While it can serve primarily cosmetic purposes – think neatening up edges around fixtures – it’s also a great energy efficiency measure, reducing air leakage up to 20%!
Originally, it used natural substances like pine tar, but nowadays it’s known to be made from a blend of acrylic polymers and fillers. Because decorator’s caulk is typically solvent-free and water-based, it’s paintable and healthier to people and planet than solvent-based options.
It works by adhering to the surface of the gap it’s filling, creating a barrier that blocks moisture, air, dust, fungi and even insects. The reason it’s so effective in this department is thanks to its specialist formula; the blend of ingredients is designed to cure as it dries out, the material filming over, hardening and shrinking as components evaporate.
Drying vs Curing
Here’s an important distinction DIYers should heed, so listen up: there’s actually a crucial difference between drying and curing.
First, drying refers to the caulk hardening as water evaporates from the caulk. Usually, it’ll be tack-free within 15-30 minutes, meaning it’s acquired a thin outer skin that stops dust from sticking. It’ll feel dry if you give it a light touch, but at this stage it’s not paintable yet. At 1-2 hours, though, it’ll be properly dry to the touch.
Curing is the chemical reaction that occurs due to the caulk drying. For water-based caulks, this happens as it’s exposed to oxygen. With other types of sealants and caulks, think silicone or polyurethane, it’s the moisture that helps it cure and achieve the smooth, hardened finish we all know and love. There are many factors that affect drying and curing, but we’re getting ahead of ourselves (more talk on that later).
Demystifying the Caulk vs Sealant Debate
While often used interchangeably, there’s a slight difference between the products we call ‘caulk’ and those labelled ‘sealants’.
Sealant is the general term for a variety of materials used to plug up gaps, cracks and holes, whilst caulk is more specific. The pair are waterproof and flexible, but some types of sealant have higher levels of silicone, making them more flexible and moisture-resistant than caulk. This said, since caulk is water-based, it’s very paintable.
Thus, if you were going to seal up a bathtub or fix some hairline fissures while tanking a cellar, you’d be better off considering a premium polymer-based product such as the HB42 Sealant & Adhesive, with its high-performing watertight and crack-proof bond.
So to sum up: caulk is a type of sealant with a slightly different compound compared to other products.
How Long Does Caulk Take to Dry On Average?
The best way to check how long you need to wait for your caulk to dry is to simply check the manufacturer’s instructions on the back of the packaging or, if in doubt, give the product specs a quick Google to get the full low-down.
This said, you can count on the majority of products taking within the 1–2-hour mark to be dry externally, and then bone-dry right to the middle (AKA cured) within 24-48 hours.
Of course, external conditions and the depth of the bead will have an impact. The time also depends on the quality of caulk, as you can see below:
- Low-Tier Caulk – this can take anywhere from 24 hours to several days (as such, it’s best to check the reviews and go for a specialist-approved alternative).
- Mid-Tier Caulk – usually taking around 1-2 hours to be touch dry and 24-48 hours to cure.
- High Grade Caulk – touch dry within 15-30 minutes and then fully cured in 24 hours.
Because of the variation, it’s important to remember to always check the manufacturer’s instructions on how to deal with your caulk or sealant of choice. After all, touch dry doesn’t necessarily equate to paintable, and neither does it mean that it can handle direct moisture if you’re caulking a room prone to humidity, like a kitchen.
Factors Affecting Drying Time
We’ve already covered how the grade of your caulk or sealant can impact the drying time of the product, but are there any other things to look out for? Absolutely. We’ve even put them into a neat checklist, so you can optimise your DIY project for quality and speed.
- The thickness of application – if you’ve slapped on way too much product, it will not only look pretty lumpy, but it will take longer to dry.
- How much ventilation the area is getting – good air flow = improved drying, since oxygen is one of the key components in the curing process.
- The humidity of the room – the effect will really depend on the type of sealant you’re using; high silicone sealants typically like the moisture, while lower silicone formulas (traditional decorator’s caulk) might be hindered by it.
- Product freshness – if your tube of sealant has been lying around unopened for a long period of time, exposed to the air, it’s going to have a harder time drying. The same goes for old product that has passed its use-by date.
- Caulk type – the ingredients list can have a major impact on the speed at which it dries out. You can even get ‘quick drying’ versions for specialist uses that require a speedy turnaround.
Quickfire Caulk Dos & Don’ts
Finally, let’s impart you with some last words of wisdom. Here are some essential best practices that will ensure your lines of caulk are dry as a bone and, of course, looking as neat as can be.
Do: Use a Dehumidifier
If moisture is a concern, the best way you can encourage your caulk to dry nicely is by helping it along the process with a dehumidifier and good ventilation. Get the windows open, turn on an extractor fan or avoid things that could add to the humidity – hot showers are going to have to wait!
Don’t: Apply Your Caulk Too Thick
Thinner layers (or beads) of sealant have a smaller surface area, so it stands to reason that they dry faster – and it’s true. With a steady hand, ensure that you’re applying enough product to seal up the problem area, maybe even using a backer rod for deep joints, but don’t overfill it. We recommend around 6mm for a 12mm gap, so a ratio of 1:2.
Do: Invest in the Best Product
A good DIY job not only starts with good prep, but good product too. Make sure you’ve chosen a high-quality sealant that is appropriate to the area and job at hand, ensuring the right amount of water resistance for the humidity levels, or even choosing a fast-acting one for time-sensitive jobs.
Don’t: Disturb the Sealant While It’s Drying
It can be tempting to go back and check whether your sealant is dry again and again during the curing process, but trust us, poking and prodding isn’t going to help. Don’t touch the product until it’s been left undisturbed for the duration recommended by its manufacturer and, if you can, avoid painting over for as long as possible (24 hours at least).
Do: Double Check
If you’re unsure, always double check, whether via a cheeky Google or returning to the product tube. When your lovely interiors are at stake, it’s better to be safe than sorry. Plus, you don’t run the risk of having to redo the job prematurely.
Let Your Caulk Dry Like a Charm
And there we have it, everything you need to know about caulk sealant drying times and the curing process. It’s deceptively simple: don’t forget to check the manufacturer’s instructions before you embark on your DIY project, make sure to pick a high-grade, flexible caulk, and don’t disturb it while it’s drying – the rest is history.
Enjoyed this guide? We have many more over on the HB42 blog, along with updates from our team – go and check them out!


0 Comments